
 By zynmag
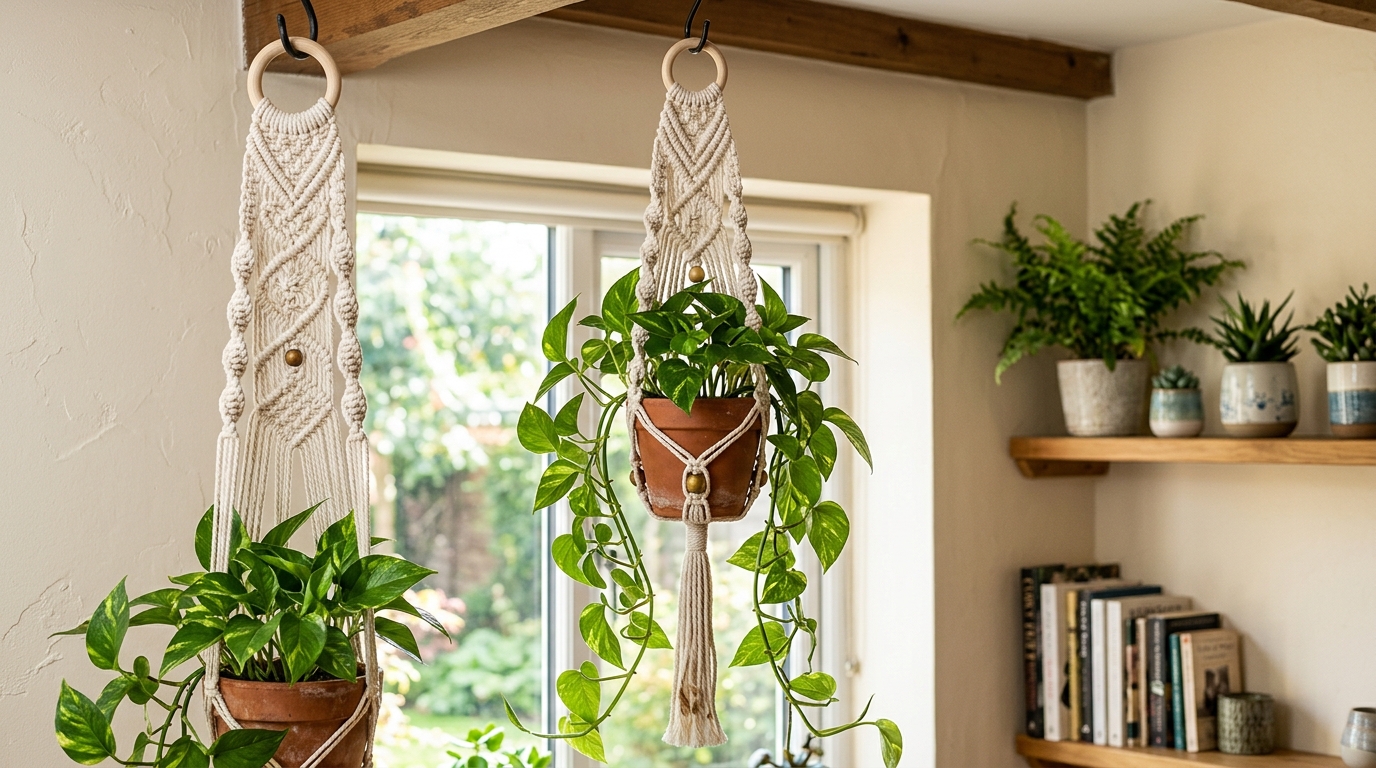
A macrame plant hanger adds natural texture and visual interest to any room while showcasing your favorite greenery beautifully. These handmade pieces combine functional plant support with artistic knotwork, creating a decor element that feels personal and unique. Many people now choose to craft their own hangers instead of buying mass-produced versions from stores. Consequently, learning the basic techniques opens up endless possibilities for customizing your home’s hanging displays. This guide covers everything you need to know, from selecting materials to mastering essential knots.
Why Choose a Handmade Hanger Over Store-Bought Options
Crafting your own piece offers several advantages that mass-produced alternatives simply cannot match. First, you control every aspect of the design, including length, color, and knot pattern. Additionally, handmade versions often use higher quality materials than cheaper retail alternatives. Store-bought hangers frequently rely on synthetic fibers that lack the warmth of natural cord. Meanwhile, creating your own piece allows you to size it perfectly for your specific plant pot. Furthermore, the process itself provides a relaxing, meditative activity that many crafters genuinely enjoy. Therefore, investing time in this skill rewards you with both a useful object and personal satisfaction.
Essential Materials and Tools
Before starting your project, gathering the right supplies makes the entire process smoother and more enjoyable. Cotton cord remains the most popular choice because it feels soft and holds knots securely. Alternatively, jute provides a rustic, textured look that suits bohemian or farmhouse-style interiors. You’ll also need a wooden ring or metal hoop to anchor your hanging cords together. A sturdy pair of scissors helps you cut cord lengths cleanly without fraying the ends. Additionally, a tape measure ensures consistent cord lengths throughout your project for symmetrical results. Some crafters also use a clipboard or project board to hold cords steady while knotting. Finally, a comb works well for creating tassels or brushing out fringe at the bottom.
Choosing the Right Plant Pot Size
Matching your hanger design to the correct pot size prevents frustrating fit issues later. Small pots, typically under six inches in diameter, work best with delicate, thin cord. Conversely, larger pots need thicker cord and a wider base to support the additional weight. Moreover, the pot’s material affects overall weight, so ceramic pots require sturdier knotwork than plastic alternatives. Before starting, measure your pot’s diameter and weight to plan your cord thickness accordingly. This preparation step saves time and prevents disappointment after completing hours of careful knotting.
Basic Knots Every Beginner Should Learn
Mastering a handful of foundational knots unlocks countless design possibilities for your hanging projects. The square knot serves as the backbone of most patterns, creating a sturdy, flat texture. Once you understand this knot, combining it with spirals and gaps creates varied visual effects. The spiral knot, sometimes called a half knot sennit, twists naturally when repeated multiple times. This technique adds movement and dimension without requiring complex pattern memorization. Additionally, the gathering knot helps bundle multiple cords together at transition points in your design. Learning the lark’s head knot also proves essential since it attaches your cords to the ring. With these four knots mastered, you can create countless variations and original patterns confidently.
Step-by-Step Guide to Making a Basic Hanger
Starting with a simple design helps build confidence before attempting more complex patterns later. First, cut eight cords, each measuring around eight feet, depending on your desired length. Next, fold the cords in half and attach them to your ring using lark’s head knots. Afterward, divide the cords into four pairs, with each pair containing four total strands. Then, tie a series of square knots about three inches below the ring. Subsequently, separate the cords into new groupings and create another row of knots further down. This technique, called alternating square knots, creates a diamond pattern that looks impressively intricate. Continue this process until you reach your desired hanger length, typically around twelve inches. Finally, gather all cords together and tie a secure knot to form the pot base. Trim the ends evenly or leave them long for a flowing, tasseled finish.
Popular Pattern Styles to Try
Once you’ve mastered the basics, exploring different patterns keeps your projects fresh and exciting. The diamond pattern, created through alternating square knots, remains a timeless favorite among crafters. Meanwhile, the spiral pattern offers a more organic, twisting look that catches light beautifully. For something bolder, the chevron pattern uses angled knots to create a zigzag visual effect. Additionally, combining multiple patterns within a single piece adds complexity and personal artistic flair. Some crafters also incorporate beads between knot sections for added texture and visual interest. Experimenting with different combinations helps you develop a signature style over time.
Color and Material Variations
Beyond basic cotton cord, exploring different colors and materials adds personality to your designs. Dyed cotton cord comes in countless shades, from soft pastels to bold, vibrant hues. Furthermore, mixing two or three colors within one piece creates a striking ombre or gradient effect. Natural jute and hemp offer earthy tones that complement minimalist or rustic decor styles. Some crafters also incorporate ribbon or fabric strips alongside traditional cord for unique textures. Additionally, metallic thread woven into the design adds subtle shimmer for modern, glamorous spaces. Choosing colors that complement your room’s existing palette ensures your finished piece feels intentional.
Best Plants for Hanging Displays
Selecting plants suited to hanging conditions ensures your display thrives rather than struggles. Trailing plants like pothos and string of pearls naturally complement the flowing lines of a hanger. Similarly, spider plants produce cascading offshoots that look stunning against macrame knotwork. Ferns also work beautifully, though they require more consistent humidity than other hanging options. Meanwhile, succulents suit hangers placed near bright windows since they need ample direct sunlight. Before choosing a plant, consider your room’s light levels and your willingness to maintain humidity. Matching the plant’s needs to your space prevents wilting or stunted growth down the line.
Where to Hang Your Finished Piece
Finding the perfect spot for display significantly impacts both plant health and overall aesthetic appeal. Near a window provides essential light for most trailing or flowering plant varieties. However, avoid placing pieces in direct, harsh afternoon sun, which can scorch delicate leaves. Corners often work wonderfully since hangers fill empty vertical space without crowding the room. Additionally, grouping multiple hangers at varying heights creates a lush, layered indoor garden effect. Ceiling hooks rated for the combined weight of plant, pot, and cord ensure safety. Always test the hook’s stability before fully committing to a permanent hanging location.
Caring for Your Macrame Hanger Over Time
Proper maintenance extends the life and beauty of your handmade creation for years. Periodically check the knots for looseness, especially if the piece holds a heavy pot. Dust accumulates on cord fibers, so gently brushing or vacuuming on low suction helps. Avoid excessive moisture exposure, since natural fibers can develop mold in humid conditions. If watering causes drips, consider placing a saucer beneath the pot to protect the cord. Additionally, rotating the piece occasionally prevents uneven fading from consistent sun exposure on one side. With reasonable care, a well-made hanger can last for many years of enjoyment.
Troubleshooting Common Problems
Even experienced crafters occasionally encounter issues that require simple troubleshooting solutions. If knots appear uneven, check that you’re applying consistent tension throughout the entire piece. Loose or slipping knots often result from cord that’s too smooth or slippery in texture. Switching to a slightly textured cotton cord typically resolves this frustrating problem. Meanwhile, if your hanger looks lopsided, measure each section carefully before tying subsequent knot rows. Additionally, fraying ends can be prevented by sealing cord tips with clear glue or tape. Should your finished piece feel too short, consider adding a longer gathering section at the top. These small adjustments help ensure your final result matches your original creative vision.
Gift Ideas and Creative Uses
Beyond personal home decor, these handmade pieces make thoughtful, personalized gifts for plant lovers. Consider pairing a finished hanger with a small succulent or trailing plant for a complete gift. Additionally, customizing cord colors to match a friend’s home decor adds a thoughtful personal touch. Some crafters also create mini versions to use as unique plant-themed ornaments or keychains. Beyond traditional plant use, these pieces work beautifully for holding candles, crystals, or small decorative items. Wedding and baby shower favors sometimes incorporate small macrame designs for memorable, handmade touches. The versatility of this craft extends far beyond simple plant display applications.
Final Thoughts
Creating your own hanging display combines practical function with genuine creative satisfaction in equal measure. From selecting the right cord to mastering essential knots, each step builds valuable skill. Moreover, experimenting with patterns, colors, and plant pairings keeps the hobby endlessly engaging over time. Whether you’re decorating your own space or crafting thoughtful gifts, this skill offers lasting rewards. With patience and practice, anyone can create stunning pieces that elevate any room’s atmosphere. Start with a simple design, build your confidence, and soon you’ll be designing original patterns. The journey from beginner to skilled crafter happens one knot at a time.