
 By zynmag
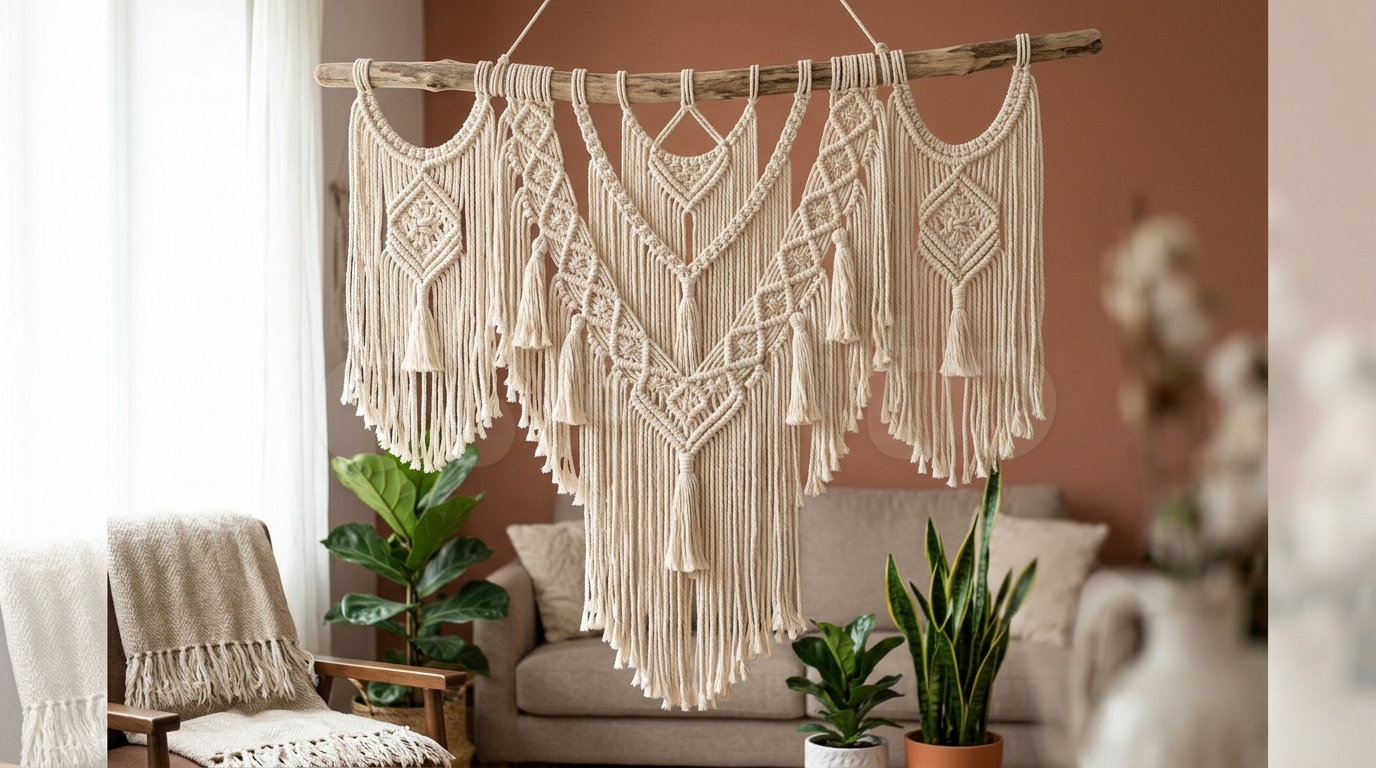
Learning how to make a macrame wall hanging for beginners feels exciting, achievable, and deeply satisfying from the very first knot. Moreover, this craft requires minimal tools, affordable materials, and absolutely no prior fiber art experience whatsoever. Furthermore, the finished result transforms any plain wall into a stunning bohemian focal point that impresses every visitor. Therefore, this comprehensive guide walks you through every single step with complete clarity and confidence-building encouragement.
Why Macrame Wall Hangings Make the Perfect First Project
Wall hangings offer beginners the ideal starting point because they combine simplicity with visually impressive results. Additionally, you work flat against a single surface rather than navigating complex three-dimensional structures. Consequently, your hands move freely, your tension stays consistent, and your progress remains clearly visible throughout the entire process. Furthermore, wall hangings allow you to practice foundational knots repeatedly within one cohesive and purposeful project.
The Creative and Therapeutic Benefits
Beyond the beautiful finished product, the knotting process itself delivers genuine therapeutic value for your mental wellbeing. Moreover, the repetitive hand movements calm your nervous system and shift your focus away from daily stress effectively. Therefore, many people discover that macrame becomes their favorite form of mindful, meditative creative practice quickly. Additionally, completing a handmade piece builds real confidence that motivates you to attempt increasingly ambitious projects afterward.
Why Beginners Succeed With This Specific Project
This particular project uses only three basic knots that every absolute beginner can master within a single afternoon. Furthermore, the forgiving nature of cotton cord means you can untie mistakes and rework sections without damaging your materials. Therefore, even if your first attempt looks imperfect, the handmade charm still makes it genuinely beautiful and worth displaying.
Complete Materials List Before You Begin
Gathering every supply before starting prevents frustrating interruptions during your creative flow. Moreover, most of these materials cost very little and remain available at craft stores or online retailers everywhere.
Cord Selection and Quantities
Choosing the right cord makes an enormous difference in how your finished wall hanging looks and feels. Therefore, consider these popular options carefully before purchasing your materials for this project.
- 3mm single-strand cotton rope works beautifully for beginners because it knots cleanly and unravels easily for corrections
- 5mm three-ply cotton cord creates chunkier, more textured results that photograph especially well for social media
- Recycled cotton cord offers an eco-friendly alternative with a slightly rustic, natural aesthetic that many decorators love
For a medium wall hanging measuring approximately 30cm wide and 60cm long, purchase at least 20 meters of cord. Additionally, always buy slightly more cord than your calculations suggest because tension variations consume material unpredictably during knotting.
Mounting and Finishing Supplies
Beyond cord, you also need a few simple items to mount, finish, and display your completed wall hanging proudly.
- A wooden dowel, copper pipe, or a sturdy piece of natural driftwood measuring 30–40cm in length
- Sharp fabric scissors that cut cleanly through multiple cord strands simultaneously without fraying
- A metal comb or stiff-bristled brush for creating beautiful fringe effects on your finished piece
- A measuring tape for cutting consistent, accurate cord lengths every single time
- A clothes rack, curtain rod, or wall hook for hanging your work at a comfortable working height
Preparing Your Workspace for Success
Setting up your workspace correctly before starting saves time, reduces frustration, and produces significantly better results. Moreover, a well-organized workspace keeps your cords tangle-free and your movements efficient throughout the entire project.
Choosing the Right Working Height
Hang your dowel at approximately eye level or slightly above so your arms move comfortably while knotting. Furthermore, working at the correct height prevents neck and shoulder strain during longer creative sessions. Therefore, adjust your setup before cutting a single piece of cord to ensure maximum physical comfort throughout.
Organizing Your Cords
Cut all your cords before beginning rather than stopping mid-project to measure and cut additional pieces. Additionally, bundle similar-length cords together with loose slip knots to prevent tangling during your setup phase. Consequently, this preparation step saves considerable time and eliminates the frustration of wrestling with tangled cords mid-project.
Cutting Your Cords: The Essential Formula
Cord length calculation confuses many beginners, but one simple formula eliminates this problem completely. Therefore, always cut each working cord to four times your desired finished length as your baseline starting measurement. Additionally, for sections with dense knotting, increase this multiplier to five times to ensure you never run short unexpectedly.
Calculating for This Specific Project
For a 60cm finished wall hanging, cut your working cords to approximately 240–300cm each in total length. Moreover, you will fold each cord in half before mounting it, so each mounted cord contributes two 120–150cm working strands. Therefore, plan to cut 20 individual cords to create 40 working strands after you mount everything on your dowel.
Marking Your Dowel for Even Spacing
Before mounting any cord, mark even spacing points along your dowel using a pencil or small piece of tape. Furthermore, consistent spacing between your mounted cords creates a neater, more professional-looking finished result overall. Therefore, space your mounting points approximately 1.5–2cm apart for a medium-density wall hanging design.
Step-by-Step Knotting Instructions
Now begins the most enjoyable part of this entire process — actually creating your wall hanging knot by knot. Moreover, following these steps in order ensures your piece develops correctly and looks beautiful from top to bottom.
Step One: Mount Your Cords With Lark’s Head Knots
The lark’s head knot attaches each cord to your dowel securely and creates your two working strands simultaneously. Therefore, follow these precise steps for every cord you mount onto your dowel.
First, fold one cord in half so both ends align perfectly with the center loop sitting at the top. Then, place this center loop over your dowel from front to back, keeping the loop on the upper side. Next, pull both loose cord ends downward through this loop from back to front in one smooth motion. Finally, pull both ends firmly downward until the knot sits snugly and evenly against the dowel surface.
Repeat this exact process for all 20 cords until your dowel carries 40 evenly-spaced working strands. Furthermore, straighten and separate each strand carefully so nothing twists or overlaps before you begin knotting.
Step Two: Create Your First Row of Square Knots
Square knots form the backbone of this wall hanging design and appear throughout most of the finished piece. Moreover, this knot looks complex but breaks down into two simple movements that anyone can master quickly.
Separate your 40 strands into groups of four, giving you ten groups working simultaneously across the row. Then, within each group, identify the two outer working cords and the two inner filler cords clearly. Next, cross the left working cord over both filler cords and underneath the right working cord completely. Then bring the right working cord under both filler cords and up through the loop on the left side carefully. Pull both working cords firmly outward to tighten this first half of your square knot into place.
Now complete the second half by crossing the right working cord over the fillers and under the left cord. Then bring the left working cord under the fillers and up through the right loop in the same smooth motion. Pull outward firmly to complete one full, even square knot within your group. Repeat this process across all ten groups to finish your first complete row across the entire piece.
Step Three: Add Alternating Square Knot Rows
Alternating square knots create a beautiful net-like or diamond pattern that defines classic macrame wall hangings. Furthermore, this technique simply shifts your groupings by two strands on every subsequent row you create. Therefore, this pattern looks intricate and impressive while requiring absolutely no new knotting skills whatsoever.
For your second row, leave the first two strands and last two strands unused on the outer edges temporarily. Then combine the last two strands from the first group with the first two strands from the second group. Consequently, this creates new groups of four that sit exactly between your first-row knots in position. Tie square knots across all eight middle groups and leave the two outer strands hanging freely.
For your third row, return to the same groupings you used in your very first row of knots. Furthermore, continue alternating between these two grouping patterns for as many rows as your design requires. Therefore, tie six to eight rows of alternating square knots below your dowel to build a substantial knotted section.
Step Four: Create a Decorative Spiral Section
Spiral knots add beautiful visual variety and textural contrast to your wall hanging’s overall composition. Moreover, transitioning from square knots to spirals prevents the piece from looking repetitive or monotonous throughout. Therefore, add a section of spiral knots below your alternating square knot section for visual interest.
Select four strands and begin tying only the first half of a square knot repeatedly on each group. Furthermore, never complete the second half — simply repeat the first half motion over and over in succession. After six to eight repetitions, your four strands will naturally twist into a stunning rope-like spiral column. Continue this technique across all ten groups until each group displays a matching spiral section of equal length.
Step Five: Add Diagonal Half Hitch Rows
Diagonal rows of half hitch knots create elegant lines that break up the geometric square knot pattern beautifully. Additionally, these diagonal elements add sophistication and visual movement that elevate your piece significantly. Therefore, adding just two diagonal rows transforms a simple design into something genuinely stunning and gallery-worthy.
Take the far-left strand and hold it diagonally across your work toward the lower right side. Then use each successive strand to tie a half hitch around this diagonal anchor cord in order. Furthermore, pull each half hitch firmly so the knots sit tightly against each other along the diagonal line. Repeat this process from the far right side moving toward the lower left to create a V-shape or chevron.
Step Six: Gather and Finish the Bottom Section
The gathering knot bundles your remaining strands together and creates a clean, intentional transition to your fringe. Moreover, this knot signals the deliberate end of your knotted section before the decorative fringe begins below.
Separate one strand and fold it into a U-shape alongside all remaining strands at the bottom section. Then wrap the long end of this strand tightly around all other strands in neat, even coils downward. Continue wrapping until your coiled section measures approximately 3–4cm in consistent, even wrapping length. Next, thread the wrapping end through the bottom loop of your U-shaped cord carefully and slowly. Finally, pull the top end of the U-shape upward firmly until both the loop and tail disappear inside completely.
Creating the Fringe: Finishing Your Wall Hanging
The fringe gives your wall hanging its signature bohemian character and flowing movement that catches every eye. Moreover, how you cut and finish your fringe determines the overall style and polish of your finished piece. Therefore, take your time with this final step because it dramatically impacts the piece’s visual quality.
Trimming Your Fringe to Shape
Trim all hanging strands to your desired fringe length using sharp scissors for clean, precise cuts. Furthermore, you can cut straight across for a neat, minimal look that suits modern and Scandinavian-inspired interiors beautifully. Alternatively, cut a gentle V-shape or curved arc for a softer, more romantic bohemian aesthetic overall. Therefore, consider your room’s existing style before deciding which fringe shape suits your space best.
Brushing Out Your Fringe
Unravel the plied ends of each fringe strand by separating the individual fibers with your fingers first. Then use a metal comb or stiff brush to brush each strand downward from root to tip repeatedly. Consequently, each strand transforms from a twisted cord into a soft, fluffy cloud of individual fibers. Furthermore, this technique creates the lush, full fringe that defines the classic macrame wall hanging look entirely.
Hanging and Displaying Your Finished Piece
Your completed wall hanging deserves a thoughtful display location that shows off every detail beautifully. Moreover, placement affects how the piece interacts with light, surrounding colors, and the room’s overall atmosphere.
Choosing the Perfect Wall Location
Hang your piece above a bed, sofa, console table, or fireplace to create an instant focal point. Additionally, natural light from a nearby window makes the texture and dimension of your knots especially visible and striking. Therefore, experiment with different positions before committing to a single nail or hook permanently.
Adding Finishing Touches
Consider weaving dried flowers, wooden beads, feathers, or colorful tassels into your piece for extra personality. Furthermore, these additions cost very little but add significant visual interest and personal character to your work. Therefore, gather a few decorative elements and experiment with placement before your cord work fully dries and sets.
Troubleshooting Common Beginner Problems
Even careful beginners encounter a few predictable challenges during their first wall hanging project. However, every problem has a straightforward solution that experience and patience deliver reliably every time.
Uneven Tension Across the Piece
Inconsistent tension creates a wavy, uneven surface that looks unintentional rather than artistically textured. Therefore, consciously maintain equal pulling force on both working cords during every single knot you tie. Furthermore, step back and assess your work from a distance regularly to catch tension inconsistencies before they compound significantly.
Cords Running Short Mid-Project
Running short mid-project frustrates beginners but happens frequently during the first few attempts with new cord. Therefore, always add an extra 20–30% to your calculated cord lengths as a comfortable safety buffer. Moreover, if a cord does run short, join a new piece using a discrete square knot hidden within the design.
Twisted or Tangled Working Strands
Long working strands twist around each other constantly and create tangles that slow your progress considerably. Therefore, bundle excess cord length into loose butterfly bobbins using simple figure-eight wraps around your fingers. Furthermore, unwrap only small amounts of cord at a time to maintain control and prevent frustrating tangles throughout.
Next Steps After Completing Your First Piece
Finishing your first wall hanging marks an exciting milestone that opens many new creative directions ahead of you. Moreover, the skills you just developed translate directly into dozens of other beautiful macrame projects immediately.
Projects to Attempt Next
Consider attempting a simple plant hanger as your second project because it uses identical foundational knots. Additionally, macrame table runners, keychains, coasters, and bag straps all build naturally on the skills you just practiced. Therefore, choose your next project based on which finished item would bring you the most genuine joy and satisfaction.
Developing Your Unique Style
As your confidence grows, begin experimenting with color, texture, scale, and mixed materials in your designs. Furthermore, studying other makers’ work on social media platforms inspires new ideas without requiring you to copy anyone directly. Therefore, absorb influences freely, practice consistently, and trust that your own unique creative voice will emerge naturally over time.
Final Encouragement for Every New Maker
Every expert macrame artist once sat exactly where you sit now — nervous, excited, and holding their very first piece of cord. Moreover, the only real difference between beginners and experienced makers is the number of knots they have tied in total. Therefore, start today, embrace imperfection enthusiastically, practice regularly, and watch your skills grow faster than you ever imagined possible.